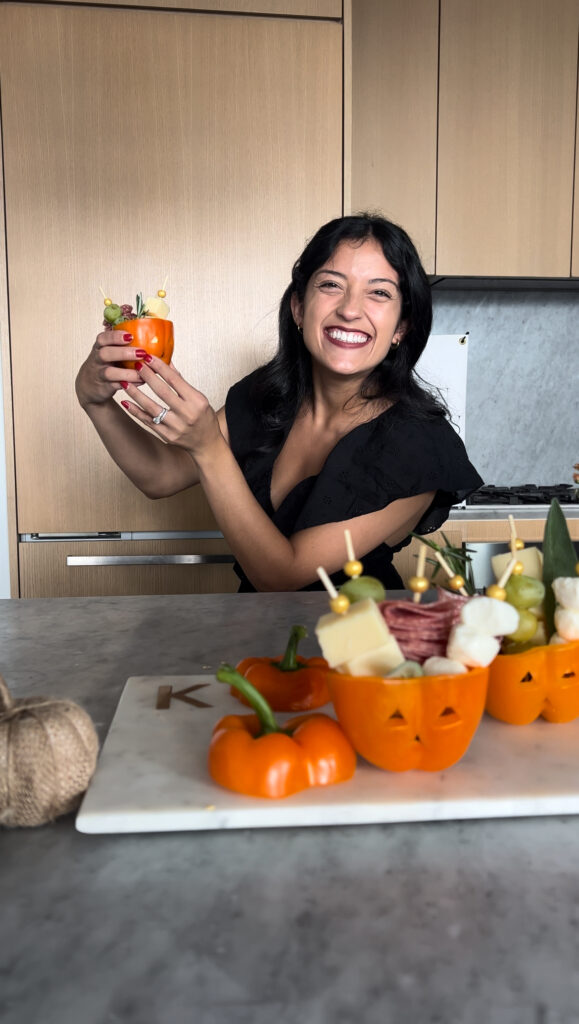
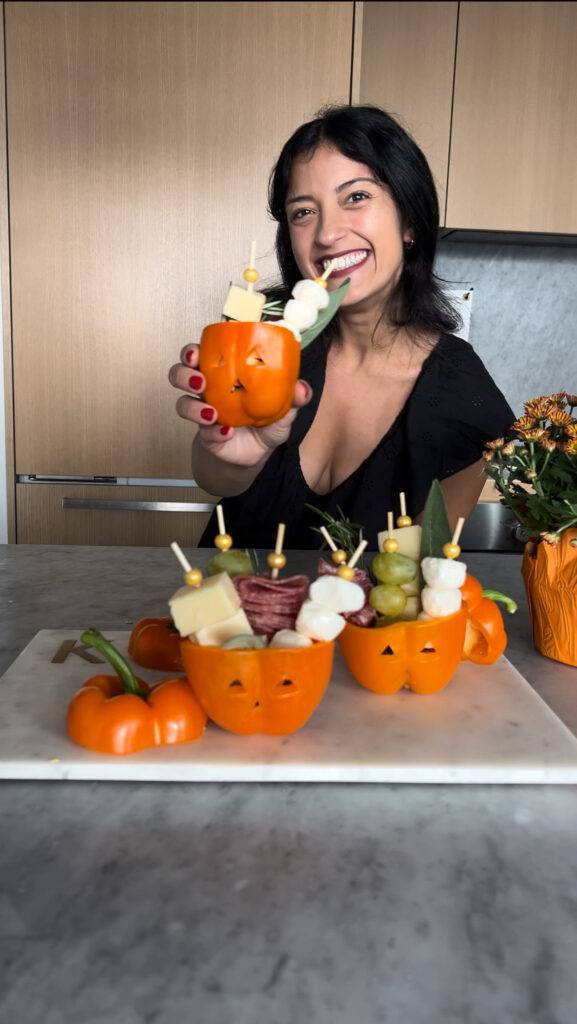
I may be biased, but I think I cracked the code on the cutest charcuterie cups of all time. These adorable little pepper pumpkins are the perfect Fall inspired charcuterie treat – and the best part? Absolutely no pumpkin carving hassle involved.
I’ve seen others make Jack-O-Latern stuffed peppers before, but thought to myself, “would it be possible to add a little charcuterie twist”? And boy am I SO proud of how these came out! I can’t wait to teach you the step-by-step pepper pumpkin process (say that 3x fast) in this guide.
Whether you’re hosting for kids or simply looking to add a unique addition to your Fall festivities, these pepper pumpkins will be sure to put a smile on your guests’ faces and bring about the spirit of the Fall season.
Step #1: Gather your ingredients & materials
To get started you’ll need the following ingredients:
- Orange Peppers: Use as many peppers as the # of people you’re hosting. For example, if I’m hosting for 10 people, I would need 10 peppers
- Cheddar: I used 3 cubes of cheddar in each cup, but feel free to adjust portions to your preferences. So if you’re hosting for 10 people, you would need 30 cubes of cheddar (10 x 3).
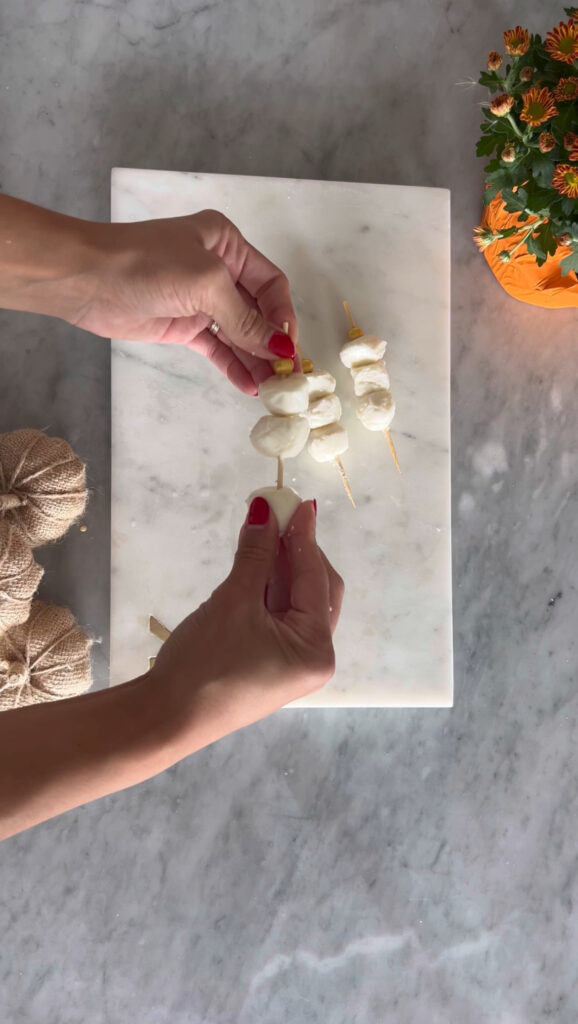
- Mozzarella Pearls: I also used 3 Mozzarella pearls per cup. So 10 people would require 30 mozzarella pearls.
- Italian Dry Salami: Use 4 slices of Italian Dry Salami per cup. For example, 10 people would need 40 slices of dry italian salami (10 x 4).
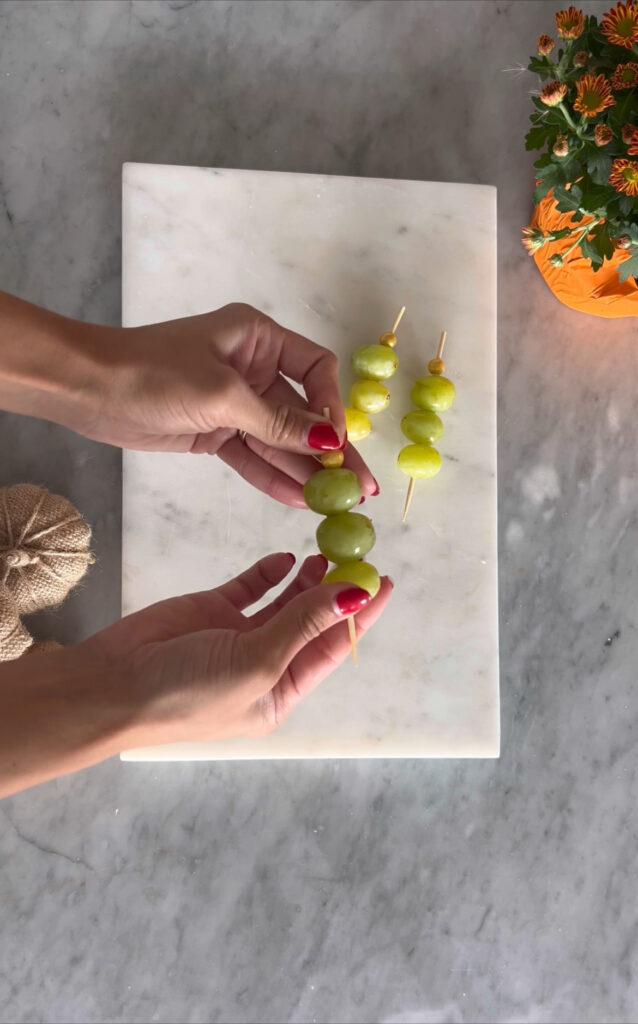
- Green Grapes: I used 3 grapes per cup (30 grapes for 10 ppl!)
- Nuts: I personally used the Everything But the Bagel Nut Duo from Trader Joe’s, but feel free to use any nuts you prefer!
- Rosemary: For a subtle pop of green
- Sage: I loved how the rosemary and the sage paired together, so I decided to use both!
You’ll also need the following materials (contains affiliate links):
Once you have all of your materials and Ingredients, it’s time to dive into your prep.
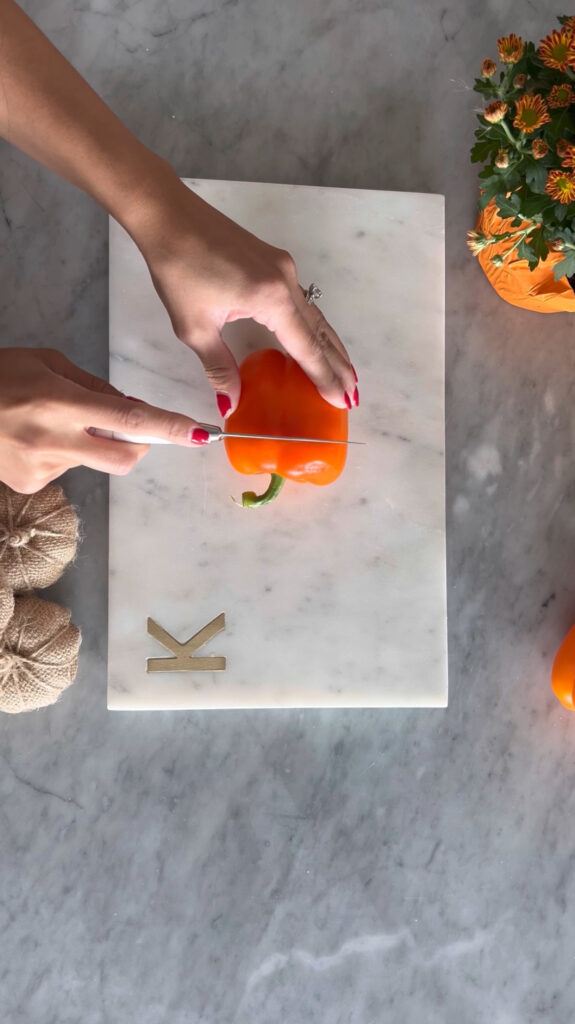
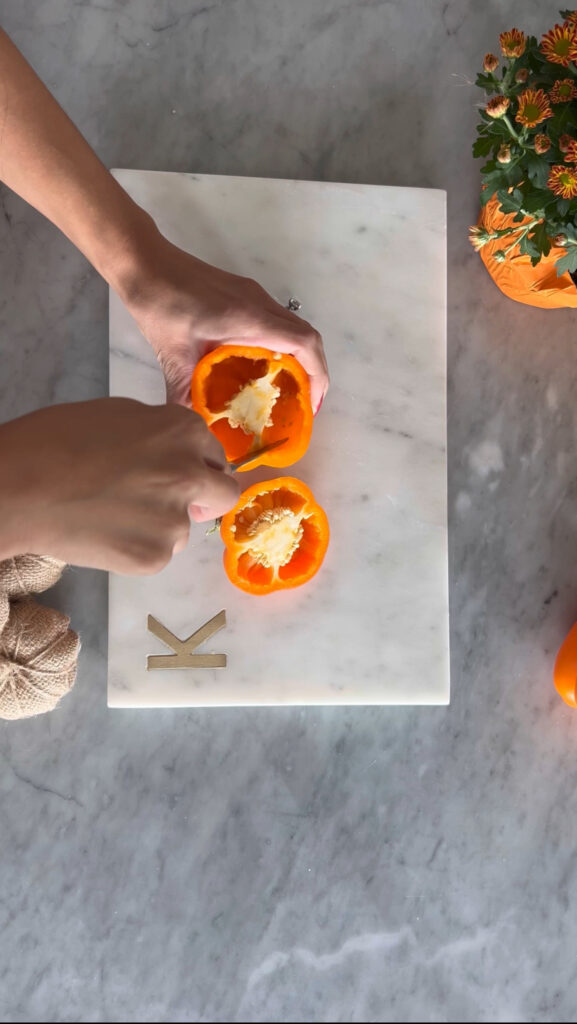
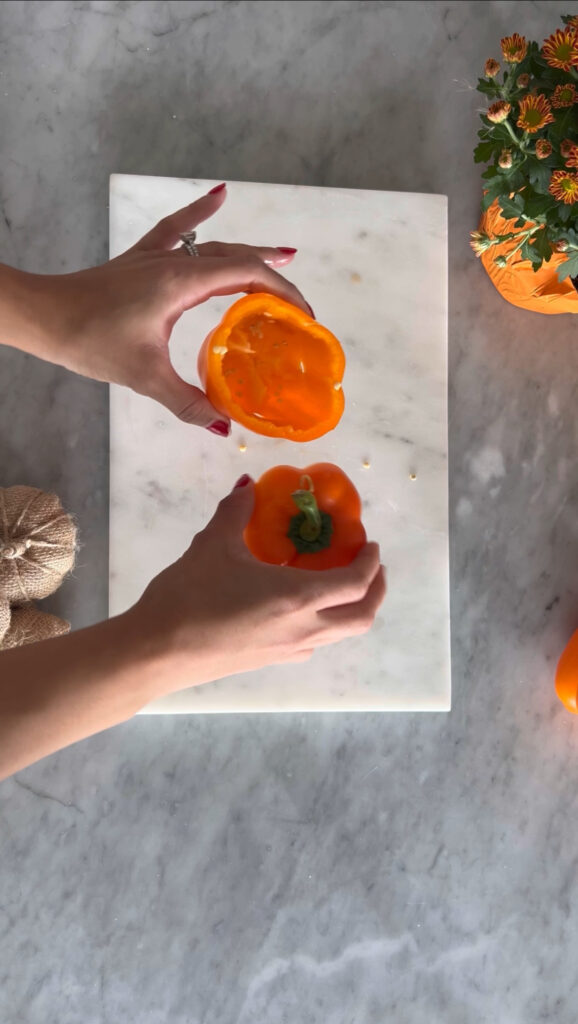
Step#2: Prep Your Peppers
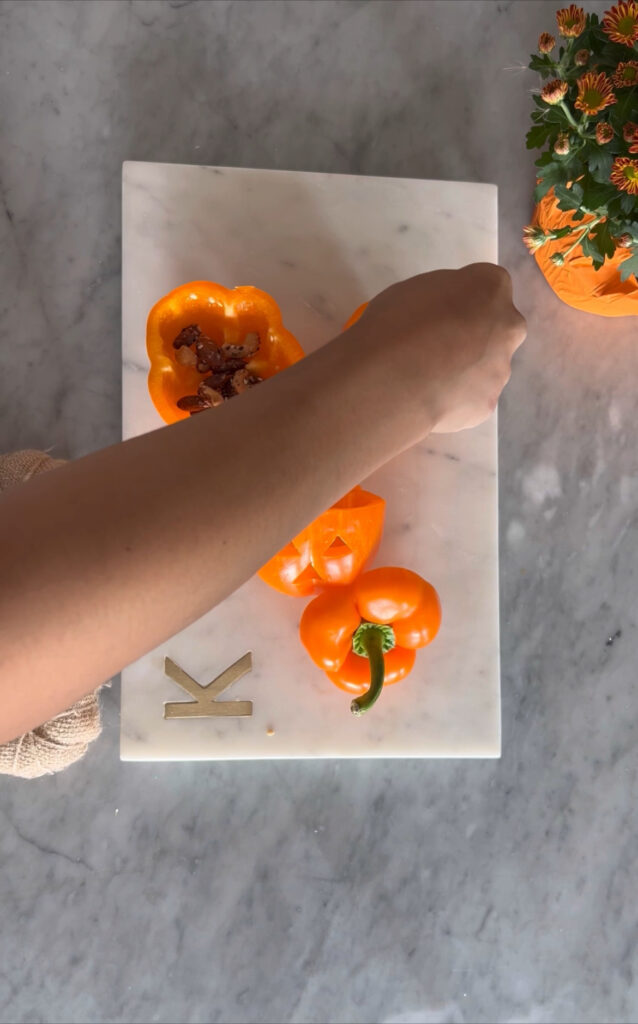
Start by slicing off the top of your pepper and removing the membranes. This includes cleaning out the seeds and removing the center so that you’re left with a clean base to build your cups.
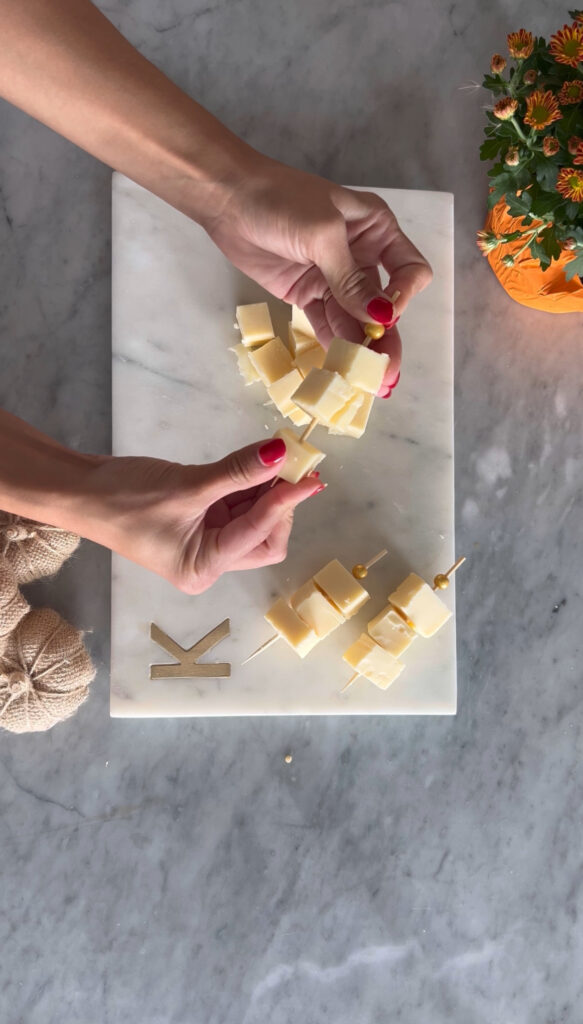
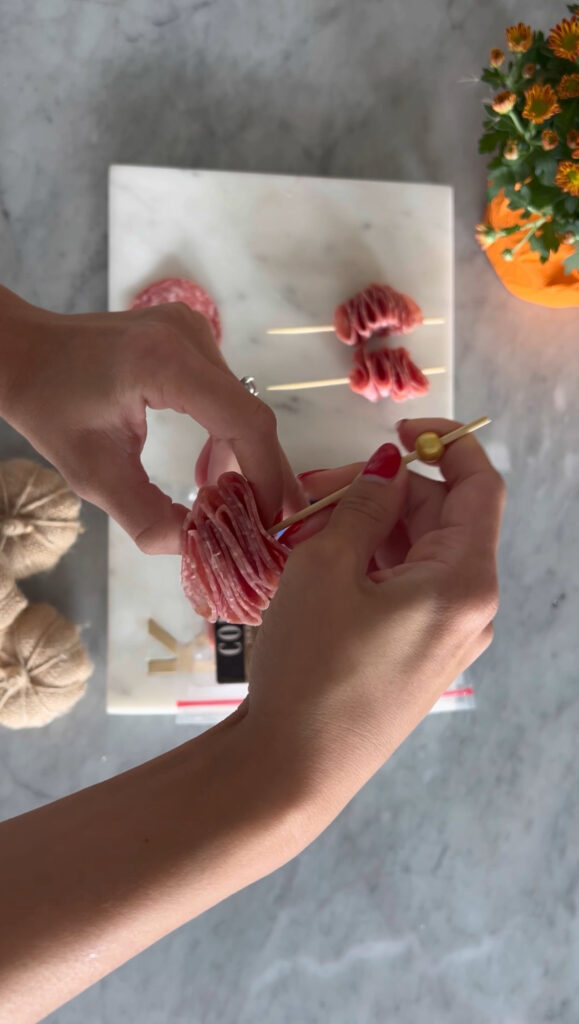
Step #3: Prepping Your Fillers
Once all of your peppers are prepped and ready to go, you’ll begin skewering each of your charcuterie cup ingredients. This includes your cheddar, salami, grapes and mozzarella. Each pumpkin pepper cup should have 1 skewer of each (1 cheddar skewer, 1 meat skewer, 1 grape skewer and 1 mozzarella skewer).
Step #4: Building Your Cups
Your pumpkins are prepped your ingredients are skewered and now it’s time for the final (and best!) step: building your cutie little pumpkins!
Start by adding nuts of your choice to the base of your pumpkins. Next, add one of each skewer to your peppers so that each cup contains a cheddar skewer, a meat skewer, a mozzarella skewer and a grape skewer. Pro tip: I actually wedged the pointy part of the skewer into the pepper itself to keep it from moving at the base.
Once done, garnish with rosemary and sage!

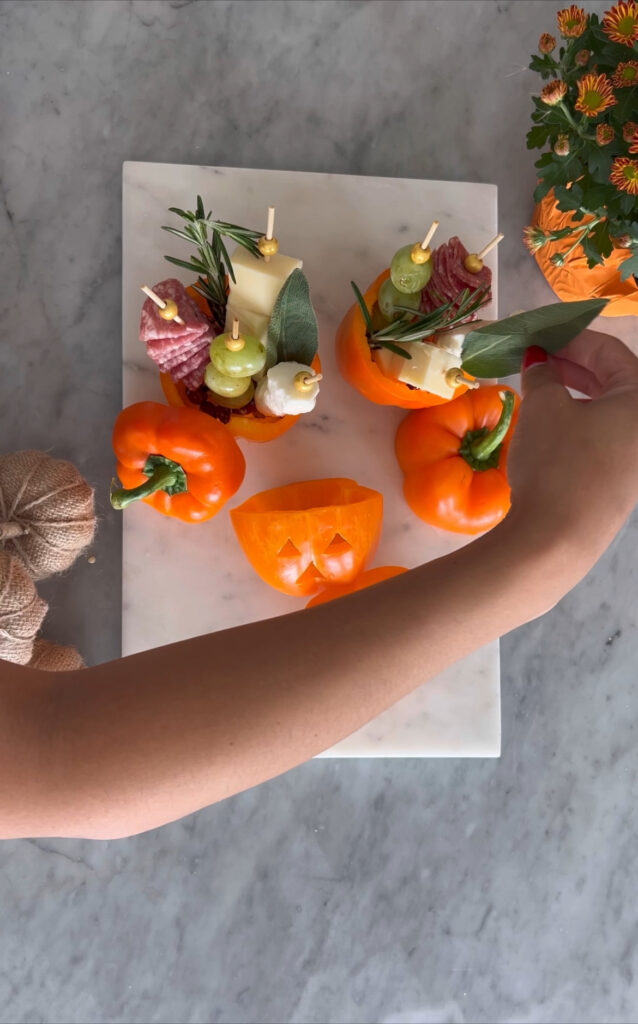
And then you’re done! How stinkin’ cute are these? Let me know if you’ll try these are home in the comments!
I’m hosting a free 30-minute fall inspired charcuterie workshop and we’re making cheese pumpkins together, live! Want to join? Register at this link: www.visionboardscharcuterie.com/freeworkshopfall